Sunday 25 August 2013

Classic Victoria Sponge

Ahh, the classic Victoria sponge, so simple yet so easy to get wrong...

I thought I'd share with you my recipe for the perfect Victoria sponge. I find using other people's recipes for Victoria sponges doesn't work. The best way is to adapt recipes and create your own recipe which works for you, after all, every baker is different. Now, of course, I am contradicting myself by giving you my recipe and then telling you that using other people's recipes doesn't work however what I suggest is that you try out my recipe then if it doesn't quite work for you, by all means change it up! That's what baking is about - finding new recipes, then adapting them in a way which you think works better.

My Victoria sponge is sandwiched together with buttercream icing and jam as I find this prevents the cake from being too dry and gives an excellent flavour. On top, I simply sprinkle some icing sugar to give it that extra touch.

So here it is...

Victoria Sponge

Ingredients: 

220g / 8oz self raising flour (sifted)
2 teaspoons baking powder
220g / 8oz soft margarine or butter
220g / 8oz caster sugar
4 large eggs
4-6 drops vanilla essence

For the filling:

(buttercream)
225g / 8oz icing sugar (sifted)
100g / 3.5oz soft unsalted butter
1/2 tsp vanilla essence

jam of your choice

icing sugar to dust

Method:

1) Preheat the oven to 170 degrees celsius or gas mark 3.
2) Grease CHECK BAKING TIN
3) Sift the flour and baking powder into a large mixing bowl.
4) Then add all the other ingredients to the bowl and whisk them together until thoroughly combined.
5) Pour the mixture into the baking tin/tins and bake for CHECK TIMES.
6) While in the oven, make the buttercream. Beat everything together for a few minutes until the mixture is light and fluffy. If the mixture looks heavy, add 1/2 tsp boiling water.
7) When cooked, leave for only 30 seconds, then remove from the tin/tins and leave to cool on a cooling rack.
8) If you have chosen to use only one baking tin, slice the sponge in half using a sharp knife so there are two equal sized layers. 
9) Once cooled, spread the buttercream and jam between the two layers and sandwich them together.
10) Use a sieve to dust with icing sugar when finished.


Friday 9 August 2013

The Hummingbird Bakery

I recently made the trip to Portobello Road in the famous Notting Hill in London with my Mum as I'd never been before and had always wanted to go there since watching the movie 'Notting Hill'. Walking up to the famous road, I immediately decided "I want to live here some day", the area is so lovely with amazing houses, shops and cafes/restaurants. I was pleasantly surprised by the village feel the area had. Another reason as to why I love London!

We hadn't really planned the day before going, however we knew we wanted to visit the famous Hummingbird Bakery. Tarek Malouf opened the first Hummingbird Bakery on Portobello Road in 2004. Since then, five more bakeries have opened - four of them in London. From the look of the amazing cakes in the cookbooks, the bakery was a definite must-see. I took some photos to share with you... (again, sorry for the photo quality, I forgot to take my camera so had to use an iPhone).


After visiting the bakery, we headed to a cafe for a drink...


One of the many gorgeous antique shops along Portobello Road.


Bye for now! xx

Sunday 4 August 2013

Brown Scones

For as long as I can remember, my Aunty has been making delicious brown scones and whenever I've visited her in Ireland, I've always looked forward to having them. Last time we were in Ireland, my Mum picked up a bag of Odlums Brown Bread Mix so we could make some at home. We thought you could only buy the mix in Ireland but I've just checked and you can also buy it in the UK.


On the bag, it simply states: "just add milk", however I add a few other ingredients to make it perfect for brown scones as the mix is actually meant for making a loaf of brown soda bread. I will pop my recipe for the scones down below so you can also attempt them.


The scones just before going in the oven.


The final result!


A close up.


Brown Scones

Makes 12

Ingredients:

500g brown bread mix (preferably Odlums)
200ml cold milk
100ml natural yoghurt
1 egg
Plain flour for dusting

Method:

1) Preheat the oven to 200˚c or gas mark 6.
2) Put the mix into a large bowl and make a small well in the middle with your hands.
3) Pour the milk, yoghurt and egg into the well and mix with your hands to form a soft dough.
4) Knead the dough a little on a floured surface, then use a rolling pin to roll the dough out until it's about 2cm thick.
5) Use a circular cookie cutter to make 12 circular pieces of dough (as seen above).
6) Place the scones on a floured baking tray and bake for 30 minutes approx. You may need to keep checking them to make sure they don't burn.
7) When baked, the scones will have a hollow sound if tapped on the base.
8) Put the scones on a cooling rack to cool, then enjoy with butter and jam (or whatever takes your fancy!).

Note: Milk other than cow's milk can be used but may produce a lighter colour when baked.

Bye for now! xx


Friday 2 August 2013

Meringues with Summer Fruits Coulis


Last week I cooked dinner for my family. I recently bought Mary Berry's Cookery Course so knew I wanted to make one of the recipes from that. I decided on the Thai green curry for main course and meringues with raspberry coulis for dessert. I thought I'd share my adapted recipe for the meringues with you!


The recipe in the book uses a raspberry coulis, however I decided to change this to a summer fruits coulis as a) it's cheaper and b) it adds more of a mix of flavours to the coulis. 


I first made the meringues as they take around 40 minutes in the oven. I've always enjoyed making meringues, the consistency of them is so different to anything else that you could make. While they were in the oven, I cracked on with the coulis. This was a lot trickier than the meringues as it required puréeing the fruit, then sieving to get any seeds out. I found the sieving the most time consuming as I was using summer fruits (raspberries, blackberries, red currants etc.) which meant there were a lot more seeds to get rid of. 

Once the meringues had cooled down after being taken out of the oven, I whipped the double cream and used a palette knife to spread them between the meringues to make little meringue sandwiches. I then put four of the six meringues I made on separate plates, poured the coulis over them and placed some fruit next to them. 

(sorry for the quality of the photo, it was taken quickly on an iPhone)

I was very happy with the way they turned out, they tasted delicious and were really light which was nice after the curry. My Mum even said they were the best meringues she'd tasted which was a real compliment!

Here is my adapted recipe:

Meringues with Summer Fruits Coulis

Ingredients: 

2 egg whites (room temp)
100g caster sugar
450ml double or whipping cream
300g summer fruits (to serve)

For the coulis:

300g summer fruits
juice of 1/2 lemon
icing sugar

Method:

1) Place the egg whites in a bowl and whisk with an electric mixer on full speed until stiff. Add the sugar, 1 teaspoon at a time, continuing to whisk until the whites are glossy.

2) Cover a baking tray with a piece of baking parchment. Place 8 individual dessert spoonfuls of the mixture onto the paper, making swirls with the back of the spoon. 

3) Bake for 45 minutes to an hour until firm and crisp. Lift one to check that it comes off the paper easily. Leave the meringues to cool slightly, then place them on a cooling rack.

4) While the meringues are in the oven, make the coulis. Purée the summer fruits in a food processor then rub the purée through a sieve to remove the seeds. I found pouring a little in at a time, then rubbing with a spoon helped.

5) Add the lemon juice, then sweeten to taste with icing sugar. Cover and chill until ready to serve.

6) Whip the cream until it is thick. Sandwich the meringues together in pairs, with the cream in the middle.

7) Place a meringue on each of the dessert plates, then pour the coulis over slightly, creating a pool at the side of each meringue. 

8) Divide the summer fruits between the plates, placing them alongside the meringues.  

Bye for now! xx


Thursday 1 August 2013

Bloglovin

<a href="http://www.bloglovin.com/blog/10093775/?claim=dvmjnvxdpvw">Follow my blog with Bloglovin</a>

Cookies and Cream Cupcakes

It was my Nannie's Birthday on Monday (29th July) and she was coming to visit us the day after to celebrate. A few hours before she was due to arrive, I decided I wanted to make some cupcakes for her as an added Birthday treat - plus I normally make her a cake for her Birthday!

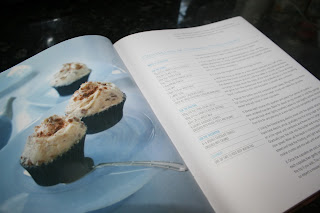
Before choosing a recipe, I decided I wanted to make something a bit different to the classic Victoria sponge or iced cupcakes therefore I pulled out one of my favourite cookbooks - The Hummingbird Bakery Home Sweet Home.

The lovely thing about this cookbook is that there is such a variety of different recipes that there is bound to be something that everyone loves. I looked for a recipe that was reasonably basic and didn't require having to go out and buy lots of ingredients we didn't already have in the cupboards. This, therefore was why I plumped for the cookies and cream cupcakes as the only ingredient I needed to pick up were the double chocolate cookies.


What surprised me when making the cupcakes was how easy they were to bake. I didn't expect them to be so simple as usually The Hummingbird Bakery cookbooks can have some more complicated recipes in them. Although they're called cupcakes, they are actually muffin sized...


After what didn't seem like long .... and a lot of mess later ... the cupcakes were ready to go in the oven. The recipe instructed to break the double chocolate cookies (I used Maryland's) into quarters and place them in the filled muffin cases. This is how they looked before going in the oven for 20 minutes at 170 degrees...


20 minutes later, the cupcakes came out of the oven looking rather large. I popped them onto a cooling rack and cracked on with making the icing. Again, this was a very easy process which didn't take long at all however required an awful lot of icing sugar (500g!) therefore certainly isn't the healthiest. After spreading the icing messily onto the muffins with a palette knife, the only thing left to do was crumble some cookies on top of the cakes and pop them on a cake stand.


To make them look more like Birthday cakes, I added three candles to the three cupcakes on the top tier.


Overall, I was pleased with how they turned out and by the looks of the empty plates everyone seemed to enjoy them! I would highly recommend buying The Hummingbird Bakery Home Sweet Home and attempting this recipe as it was simple yet the result was delicious.

Bye for now! xx